November 4, 2020
As a Wedding Photographer and educator, there are common Flash problems I see photographers running in to over and over again. Not only can this be frustrating, it can make Flash seem more intimidating than it really is! As someone who struggled with Flash for quite some time before figuring it out, I get that! And I’m here to help!
Today, I want to look at four common Flash problems wedding photographers experience, and solutions to turn your Flash frown upside down!
Common Flash Problem #1: Orange Color Casting
If you’ve shot weddings for any length of time, you’ve probably encountered the oft-lamented “orange barn wedding”. These venues, while often full of rustic charm, can be particularly challenging for reception photos. The scenario usually goes something like this: you whip out your Flash. Put the Flash in “bouncing” position. Fire. Look at the back of your camera. Give up in defeat.
Wash. Rinse. Repeat Defeat. All night long.
How to Fix Orange Color Casting with Flash
What causes this unfortunate color cast? Either (1) you’re using too much room light (from your camera’s exposure settings) and not enough Flash power. Or (2) in the case of the orange barn, you’re not bouncing off a pure white surface. In this case you’re actually compounding your problem by spreading that orange color… ERRWHERR.
To fix color casting issues caused by issue #1 (which is usually the case in cleaner, lighter spaces), simply bump up your Flash power, bump down your camera’s exposure settings (ISO, for example), and keep bouncing away.
When fixing color casting issues with your Flash in an orange barn, however, you’ve got to give up your “right to bounce” and light direct! Yes, I’m talking about a Flash that’s pointed direct at your subject (either from a stand with an umbrella, or your camera with a modifier attachment)! I had to go back into the archives a bit to find our last orange barn wedding (we don’t shoot them as often these days), but here’s a great example of how to fix the orange barn color casting issue.
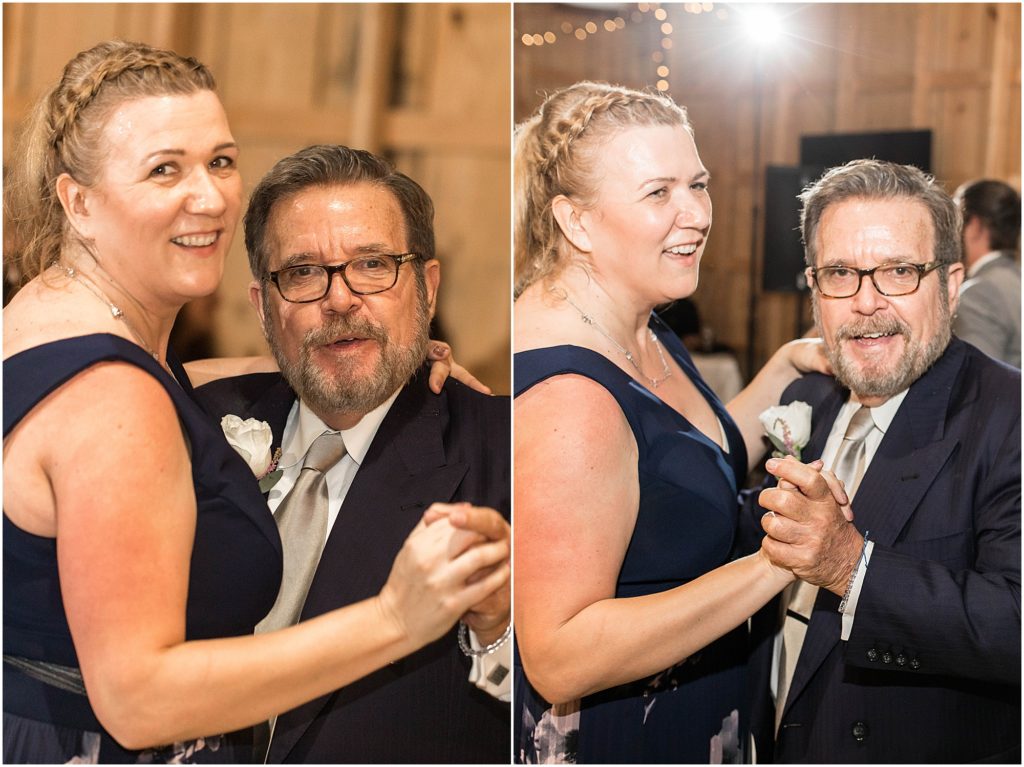
In the image on the left, you can see the typical color casting that occurs in an orange barn. However, by shooting direct instead of bouncing my Flash, I was able to use the pure white light of the Flash to produce a much more natural skin tone for the subject!
Common Flash Problem #2: DJ Lighting
A close second behind “Orange Barn Syndrome” (can we just go ahead and make OBS a clinical diagnosis for photos? Ha!) that I hear from photographers is DJ Lighting casting all sorts of crazy colors on partygoers as they dance the night away. It usually looks something like this:
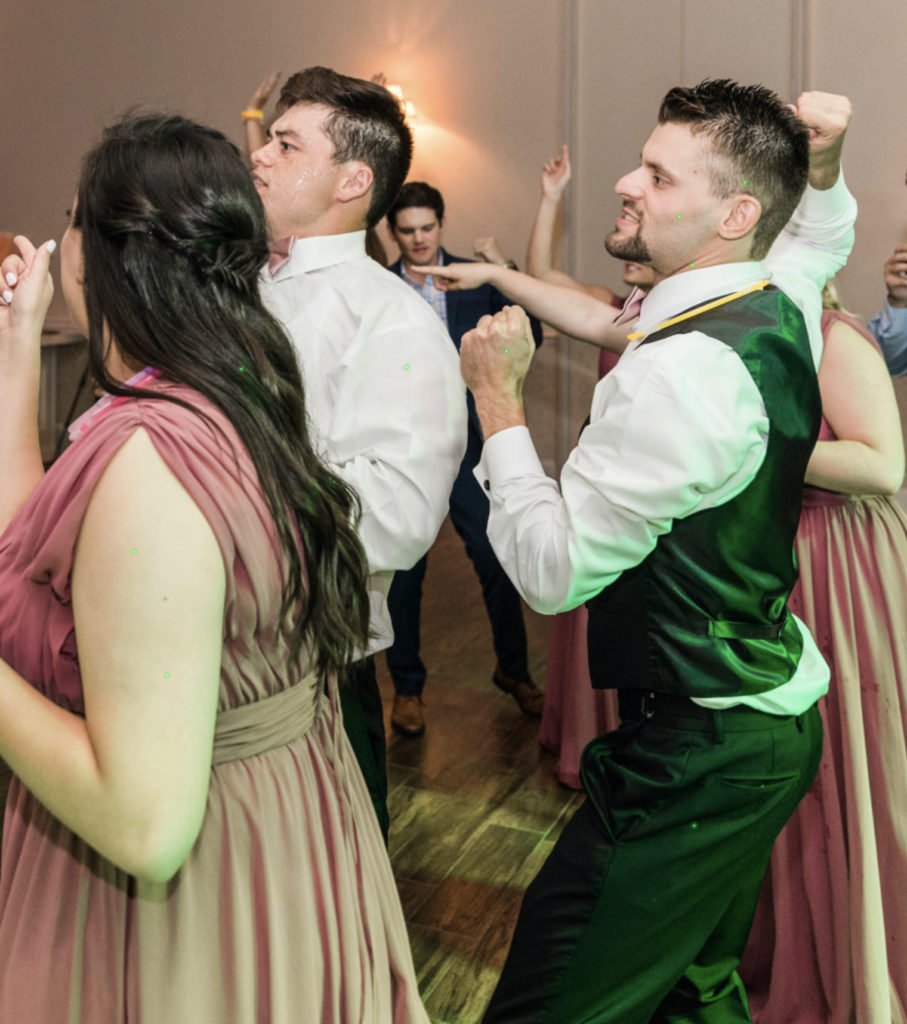
Ugh. Lasers, man. What a mess… if you don’t what to do with them! Thankfully, not only is there a solution to this common Flash problem, there’s a way to turn it into your new best friend!
How to Fix DJ Lighting Issues with Flash
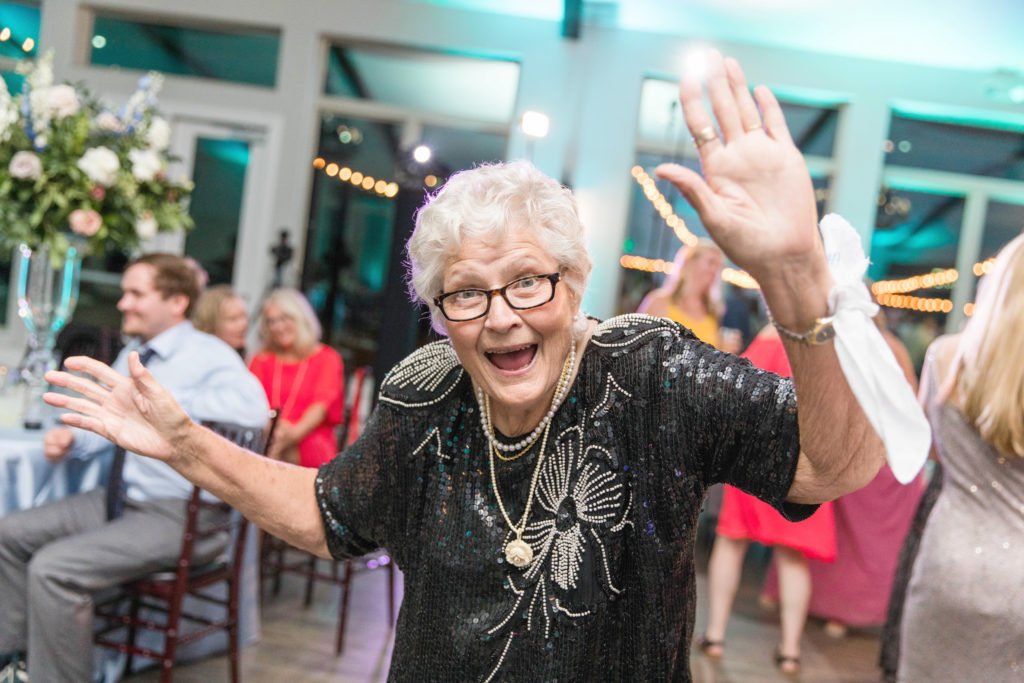
Your DJ is typically giving you an incredible gift with all those lights, especially if you only shoot with one Flash! To fix this problem, simply shoot with your DJ’s lighting behind your subject instead of in front of your subject! All of the DJ lighting will create a brilliant backlight for your subject (note the purple lighting around grandma’s hair), while you light them from the front!
Common Flash Problem #3: Flash Too Bright on Faces
I love bringing second shooters along on weddings to learn how we do what we do. I wish I had shadowed another photographer before diving right in! When I teach our second shooters a 10-minute version of the 3 hours of content in our Flash Course, one of the most common problems we typically troubleshoot first involves over-exposed Flash images. Here’s a straight-out-of-camera (SOOC) image from one of our second shooters early in the reception:
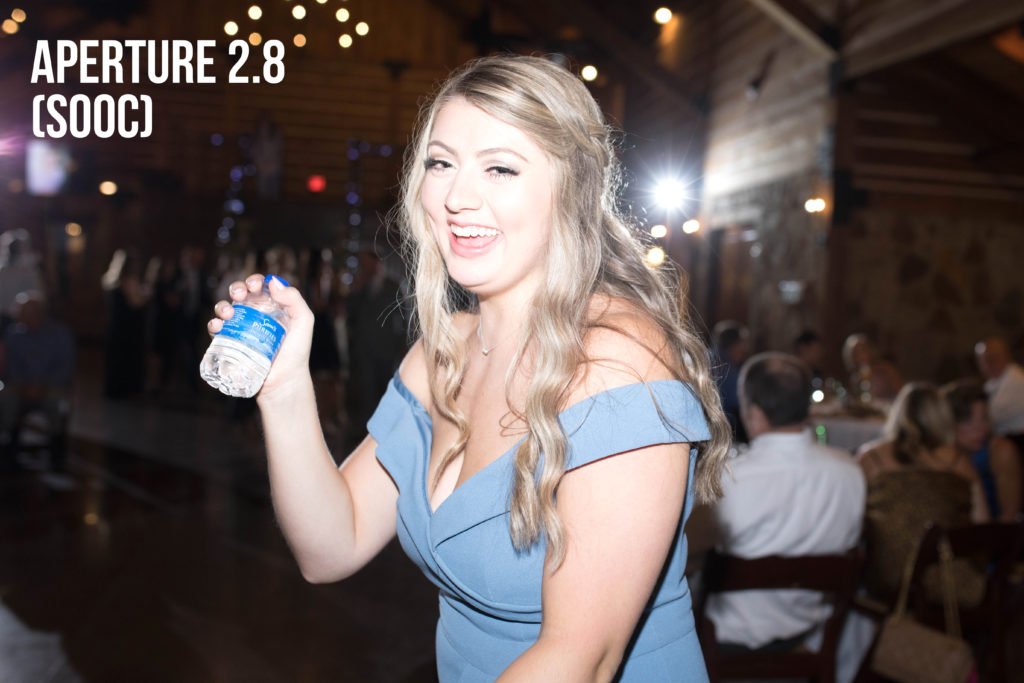
Have you ever taken a Flash image that looked something like this? If so, this next fix is for you!
How to Fix Overpowered Flash Images
There are two ways to solve this common Flash problem. One is simple and obvious: lower your Flash power. The other, however, is a bit less obvious: increase your aperture.
As a natural light photographer, you probably think of aperture as that setting you adjust to get the creamy, dreamy, blurry bokeh in the background of your images. With Flash, it also carries a distinct function: your aperture controls the brightness of your subject. Lower aperture numbers will brighten your subject, and higher aperture numbers will darken your subject. Here’s another straight-out-of-camera image from that same second shooter later in the night, after we corrected the issue by bumping her aperture just a bit:
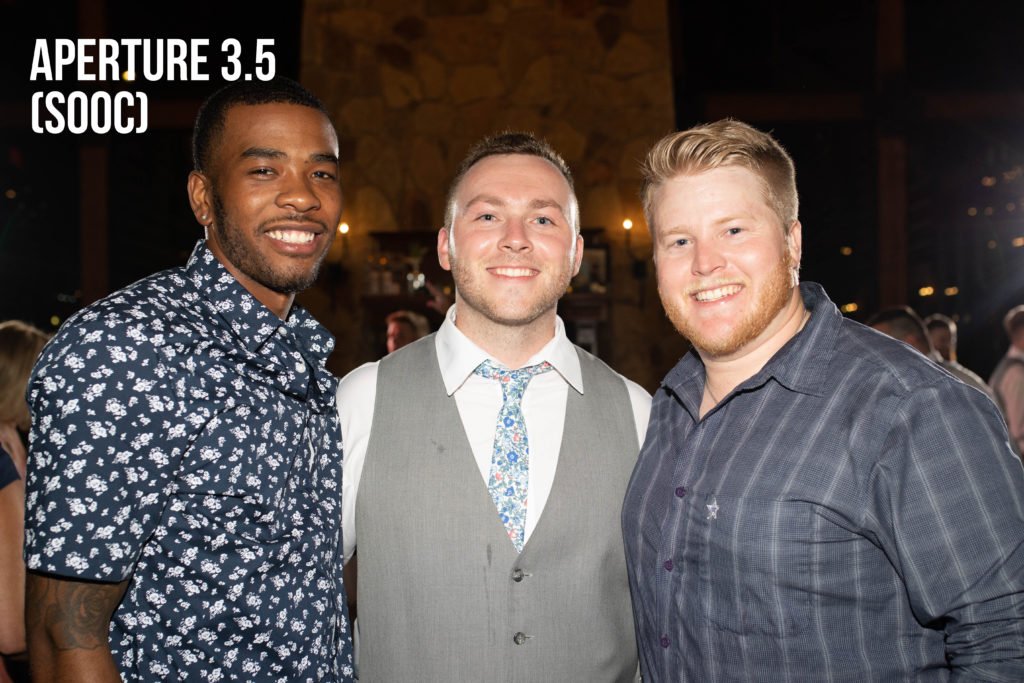
The next time your party shots are just too blown out on people’s faces, and your flash power is already incredibly low, try increasing your aperture to balance out the image’s exposure!
Common Flash Problem #4: Flash Not Bright Enough
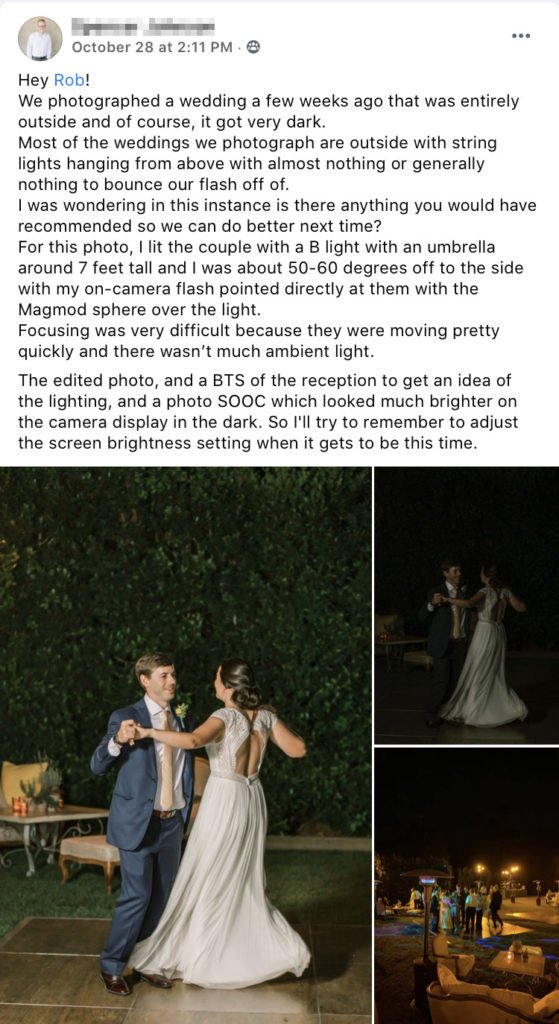
Last, but not least, is an issue that sits on the other end of the spectrum from Common Flash Problem #3. Sometimes your images just aren’t bright enough. We had a new student in our Flash Course encounter this very issue recently:
How to Fix Underpowered Flash Images
The solutions for underpowered Flash images could be any of a variety of things, but here are a few possible solutions to get you started:
- Increase the Flash power on your subject.
- Move (or move the Flash) closer to the couple. This will not only make the light brighter, but also softer.
- Add a 2nd Flash behind the subject, to help light the scene.
- Bump your ISO, which increases lighting on the subject AND the background.
- Switch to a prime lens and take advantage of lower apertures. Remember, aperture controls the brightness of the subject, so this would make your couple (or whatever is lit by the Flash) brighter.
In Conclusion
These are just a few of the most common Flash problems we see wedding photographers encountering. As you can see, there are simple solutions for solving each of them! Got a Flash issue we didn’t hit on? Leave it in the comments below!
Looking to dive deeper? Don’t miss our FREE Webinar! Two options to choose from: November 18 and 19!

Site Design by Square 8 Studio
OUR ADDRESS
3000 S Hulen Street
Suite 124-791
Fort Worth, TX 76109
QUICK LINKS
NEW!
FOUR COURSES TO CHOOSE FROM
Learn More
LOG IN
Enrolled in our Courses?
Square 8 Studio is a Fort Worth College & Sorority Photography company serving college students at TCU and SMU.
Privacy Policy
Terms & Conditions
